Like i said in my previous post my original idea was for a full fairing Cafe-Racer and it just took me four years to make it happen.
This project started last summer and it took me 9 months to get to the final result. So, going back in time in July 2016, for start i had both front and rear subframes (brackets). Those subframes are evolving for the last three years, so they are, i guess perfect. I have all the necessary clearences from every mooving point in the front and as i'll point out by the end of this post, the rear is finally as easy to place and remove as it can get.
Having the subframes ready the only reasonable start is to have all the parts of the full fairing Sport 1000s (or Paul Smart), placed on the ST and from then on to see where we can get. Here it is in the first day.


In the above pics you see the parts that had to be build with body filler, created with masking tape and also the holes i had to open, in front for the radiator's lower end and back for the engine's radiator fluid pump.
The ST's fuel tank has a different slope compared to the Paul Smart's tank. You can see that difference as an angle in the pic bellow.

So the fairing on the ST should have the same angle compared with the SC fairing. Pointed out in the next pic.

So white masking tape for the areas that had to be created and black tape for the new lines that the new fairing must have and you can see the difference between the starting shape and the desired shape in the pic bellow.

So the bike on the left is my goal. You can see in the lower end of the side panel marked again with black tape, the shape and the slope of the panel's edge. And also in the front fairing's upper end you can see that i knew that early that the fairing's upper part and the windshield had to be shorter. In the pic bellow you can see why these are the desired lines. The side panel's lower end is parallel to the main frame's rear beams and the panel's front line is parallel to the main frame's front beam.

Regarding the seat, my initial thought was to build a tail based on the Imola one. And this was my first Photoshop scetch.

So with an Imola tail, a SC seat-back and some masking tape, i build the seat. Check next pics.


And in case you wonder what on earth do i see with all those tapes on the bike, have you ever seen pics that compare human to insect vision?

Well this is what my eye sees. Kostas vision.

Or in some cases.


Now, do i have your attention? Good!
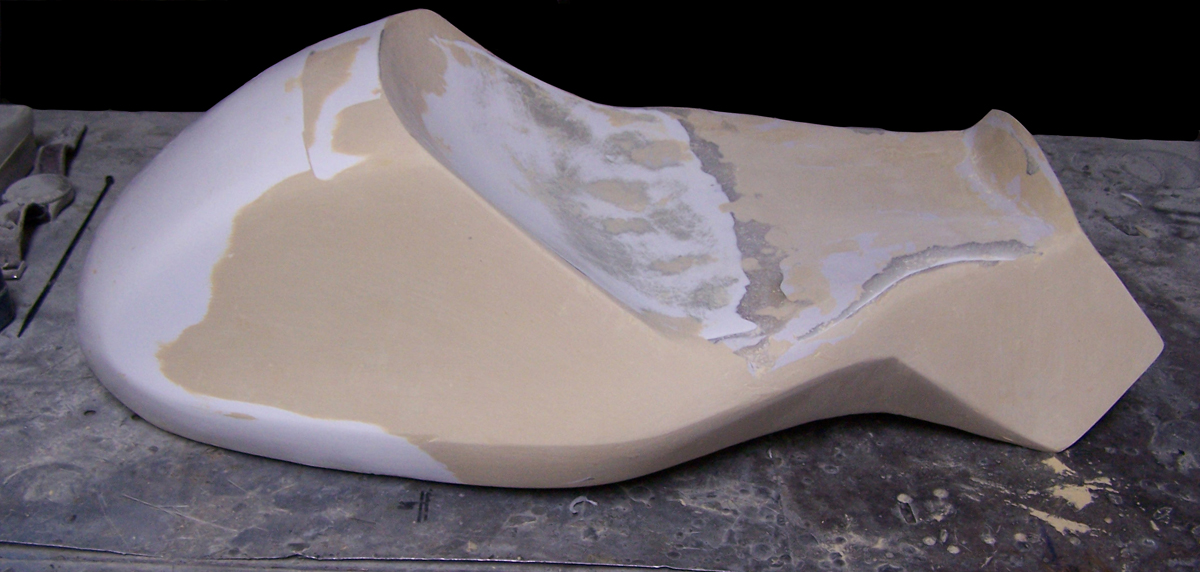
So having the new lines and curves marked on my panels it was time to work. Like i said i used body filler (i'm not talking about the body in the previous pic) to create the surfaces and sandpaper to form them. After a week on the left hand panel i had the final shape. Then came the hardest part of this project. To build the right one, as mirror symetrical as possible to the left. Because this is Greece you know there is no CAD or machine created molds. These are the original parts and from them i have to build the molds.


Another week for that too and of course the seat. Tail from an Imola, seat-back from a SC and custom front end.


And in case you wonder how come this workshop is always so dusty, well it is just 35m^2 and this is the dust of just one days work on the seat. By the way, throughout this project i used 8 kgs of body filler.
Finally all the pieces are ready, so i roll it out of the shop to have a look at the bike under day light and from a distance. My first reaction? Disaster! It may looks ok from some angles, but i don't build this bike to look ok, i want it to be HOT SEXY.


The main problem was the rear seat. The Imola's line can't be parallel to the frame's beams and if it does, it's not an Imola tail anymore. In the next pic you can also see the difference in the fairing's old and new, upper rear end. So far.

With the bike in the open i placed the original SC seat on, to see if by chance was any good. It wasn't.

In fact it looked so out of proportion that i've spend sometime to realise why. Well the reason is that the half fairing version has all of its volumes on the upper end of the bike, so the back balances the front. Because the full fairing version is a frontloaded design, with its lower fairing, it would be proportional only if it has triangle-like shape. So having those corrections in mind i went back to the photoshop. This time i sketched an SC based tail. In the following pic you can also see what i've mentioned before, about the different volume balance between a half fairing and a full fairing bike. In the next pic both bikes look proportional. That is because the full fairing bike has a smaller tail.

As you can also see on the full fairing bike above, i've desided to close the gap under the seat. So back in the workshop again, body filler, sand paper and body filler and sand paper again and again and again and this is our new seat.

So out in the open again to see the new shape. Definitely more proportinal than before.


And now it is time for the little details. What was the last details that i wanted to fix? First of all i wanted the pump to be hidden behind the fairing, this is something that i'll explain why, in a while. So look the next three pics to see how the bike transforms under that change. Which when made needs a correction on the upper part of the fairing and the windshield, in order for the hole design to remain proportional.


The next correction, is in the lower end of the fairing. Instead of an angle (left pic), i want it to end in a curve (right pic).


And this is a back view of my new goal.

And back into the workshop again. After the final corrections this is the result.


The half fairing project, was just a clever mounting of the SC fairing and tail on an ST. This project is a completely new design. In the red circle in the pic bellow is the only part of the SC shape that you can find on this bike and even that not 100%, cause in the final build i removed 4cm of the fairing's lower end (marked with the red line).

I will try to make a summary of all the factors that guided this design.
The first factor was that i wanted the build to be arround the fuel tank, in order to keep the cost of any such project reasonable. I also find it more intriguing, to try and build a completely new bike, with as many parts as possible from the original one. This attitude was inspired to me by the old Italian designers school (check out next post).
For start, the fairing's front line, had to be parallel to the frame's main beam (light green lines). Then i used the angle in the lower side of the fuel tank marked with red in the pic bellow. This line gave me the shape of the seat and the shape of the fairing's rear end. The slope of the frame's rear beams, gave me the slope of the fairing's lower line (marked in light blue) and the tank's side line was extended on the front fairing (yellow). This is how i have embodied the modern fuel tank, into the post modern Cafe-Racer shape.

The next pic is the above pic, without the color lines, so that you can have make a comparison between targets and results. The winglet seen also in this pic, is just one of few aerodynamical features i have created for this kit and they will be available as an "Aero-pack".
Also the extra short front fender is especially designed for this kit.

By the end of the week, i guess, this bike will be ready for the street and i will have the first pics. It will be a Dark Grey with Red "Senna" inspired bike, something like the Photoshop you see bellow.

I'm as curious as you are about the final result. Stay tuned.